This is just a quick post about a nice little tool I found that allows you to setup and save your SSH tunnels and then quickly bring them up when required. Why might you want to do this? Well theres plenty of reasons. They range from it feels geeky, to you're paranoid about those kids in the coffee shop with the "Hack Naked" stickers on there laptops, to just because you can.
Now this guide does assume that you have a SSH server that you can get too and its running Privoxy on port 8118.
The tool is Gnome SSH Tunnel Manager (gSTM) and is available from http://gstm.sourceforge.net the repositories.
apt-get install gstm
Now, a quick reminder of the manual way:
ssh -NL 8118:localhost:8118 synjunkie@ssh_server_ipaddress
Then point your browsers proxy at localhost:8118
And now the pretty way.
Create The Tunnel
Open gSTM from Applications > Internet Menu, and enter your SSH server details. Click Add to configure the port redirection settings and click OK.
Save the settings by clicking OK.
Now you have a tunnel that is saved for you and can be started by Clicking on the Start Button.
Configure The Browser
Now you need to tell Firefox to use your tunnel. Open Firefox Preferences from the Edit menu in Firefox and amend the network proxy settings.
Now you can safely browse the web
You could make this even more seamless by adding a Firefox extension to allow you to have multiple proxy configurations set up and simply select which one you want using drop down list on the toolbar. Switch Proxy works well for this.
Check The Tunnel
You can test that your traffic is being tunneled by using Netstat, Etherape, TCPDump or a number of other tools. Bellow I have used Netstat.
I can see that I am making connections to local port 8118 and that the only external web traffic is going to my SSH server.
When I used Etherape to check my traffic I saw that DNS was not tunneled so one thing to bear in mind is that if your attacker is using subverting your DNS, The whole tunnel will not work. Which I guess is better than it working and your data being stolen!
See my previous post for more details on tunneling without a GUI
Saturday, December 12, 2009
SSH Tunneling the Pretty Way
SSH Tunneling
Firstly, a SSH client connects to a SSH server, logs in with either a password or certificate and communicates over an encrypted tunnel. The beauty of SSH is that it is also easy to tunnel other types of traffic such as HTTP or VNC over the tunnel. This is useful for the following:
> Secure Administration of a remote server.
> Secure File transfer.
> Securing web traffic over a non-secure wired or wireless network.
> Bypassing of restrictions and filtering imposed on the local network.
Tools
> Privoxy
> SSH
> Screen
Setup
At home I have installed SSH on a server and started the service (/etc/init.d/ssh start) listening on port 22 for SSH traffic. I have set port forwarding up on my firewall to allow traffic to hit the server on this port. Usually I will set up a non-standard port but for the sake of an easy explanation I'll leave it at port 22.
On that server I have also installed pivoxy (apt-get install privoxy), and started it (/etc/init.d/privoxy start). By default, Privoxy binds to 127.0.0.1:8118 , and I have also installed Screen. Screen is a program that allows you to have multiple terminal sessions open at once and leave them running after disconnecting from the SSH server.
Connecting To The Server
From my client I connect to the server by using the following command:
ssh synjunkie@ssh_server_ipaddress
After logging in I can issue commands as if I'm sitting at the server. After connecting I would start Screen by issuing the `screen` command. If I wanted to connect to a previous screen session I would use `screen -r`
You navigate through Screen by issuing commands through key-bindings. A few of the ones I find most useful are:
Ctrl+a c new window
Ctrl+a n next window
Ctrl+a p previous window
Ctrl+a " select window from list
Ctrl+a A set window title
Ctrl+a ? show key bindings/command names
Ctrl+a d detach screen from terminal
Screen is great because you can leave a scan going in one session, irc in another and say a traffic capture in another.
Tunneling Traffic
as well as connecting to the server I might want to tunnel some traffic over SSH to my home server and then back out.
For this I would issue the following command on my client and log in.
ssh -NL 8118:localhost:8118 synjunkie@ssh_server_ipaddress
After setting up the tunnel I would go into the proxy settings on my browser and point them to localhost port 8118.
I hope this illustrates a couple of good uses for SSH.
Free Internet Using ICMP Tunnels
I'm planning to go on a course soon and I was concerned that I might have trouble finding some free WiFi Internet access. I decided to look at how I could get by this pay-for-internet problem and a couple of things I found out is it's quite easy to tunnel certain types of traffic within other traffic.
As i've stayed in hotels before I have noticed that the biscuits in the rooms are often crap and that I get ping responses when I'm bored. So here is my little guide to turn those ping responses into full SSH and HTTP access using ICMP Tunnels.
How This Works
Really it is very simple. If your computer (client) can ping a computer on your home network (server/Proxy) it can use a program (ptunnel) to encapsulate data in the data portion of the echo request packet. As the computer on the home network receives these packets it proxies to the destination (either itself or another server) and encapsulates the response in the echo reply back to the client.
Tools
- ssh
- ptunnel
- browser
Server/Proxy Setup
For the purpose of this example I have a server running SSH on port 22 (bad I know but this is just an example) and a proxy on port 8118.
On the server I SSH in, start a screen session, and run the following command:
ptunnel -v 4 -x catwoman -f tun.log
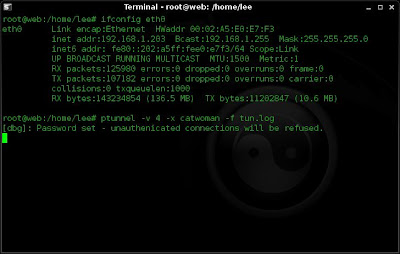
I then detach from the screen session with ctr+a d
This leaves ptunnel running with a verbosity of 4 (pretty verbose), a password of catwoman and logging to a file called tun.log.
Client Setup
If i want to tunnel SSH through ICMP to my server at home I use the following to create the tunnel:
ptunnel -p 192.168.1.203 -lp 8000 -da 192.168.1.203 -dp 22 -x catwoman
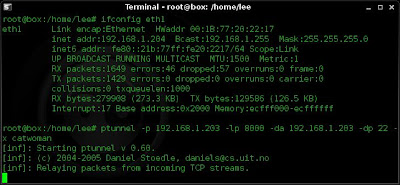
This sets up ptunnel to use the proxy (-p) of 192.168.1.203, creates a listening port on my client box of 8000. It connects to the destination address of 192.168.1.203 on a port of 22. It also uses the password of catwoman.
I would then open another terminal and type:
ssh -p 8000 lee@localhost
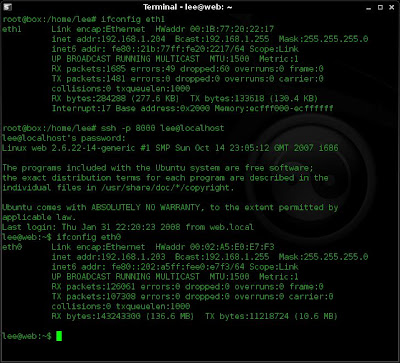
This all well and good for a bit of remote admin. Supposing I need to do a little surfing through my ICMP tunnel. Well I just use the following command:
ptunnel -p 192.168.1.203 -lp 8000 -da 0.0.0.0 -dp 8118 -x catwoman
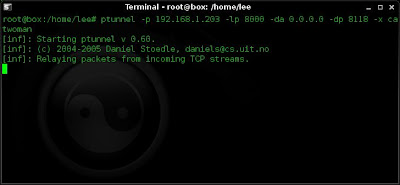
I then go to my network properties on my browser and change the proxy settings to point to localhost on port 8000
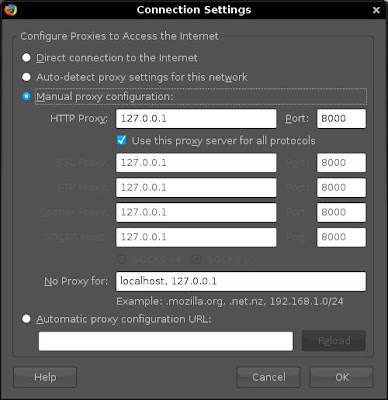
And bingo. I get web access.

If you want to keep a track of things you can also view the log that you set up on your server (remember, the -f tun.log)
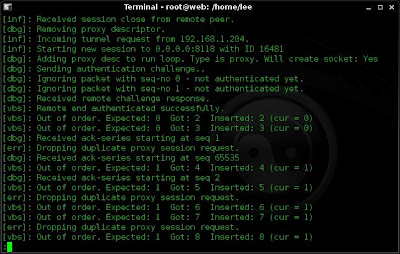
That's about it. I'm also in the process of creating some DNS tunnels but i'll save that for another blog entry.